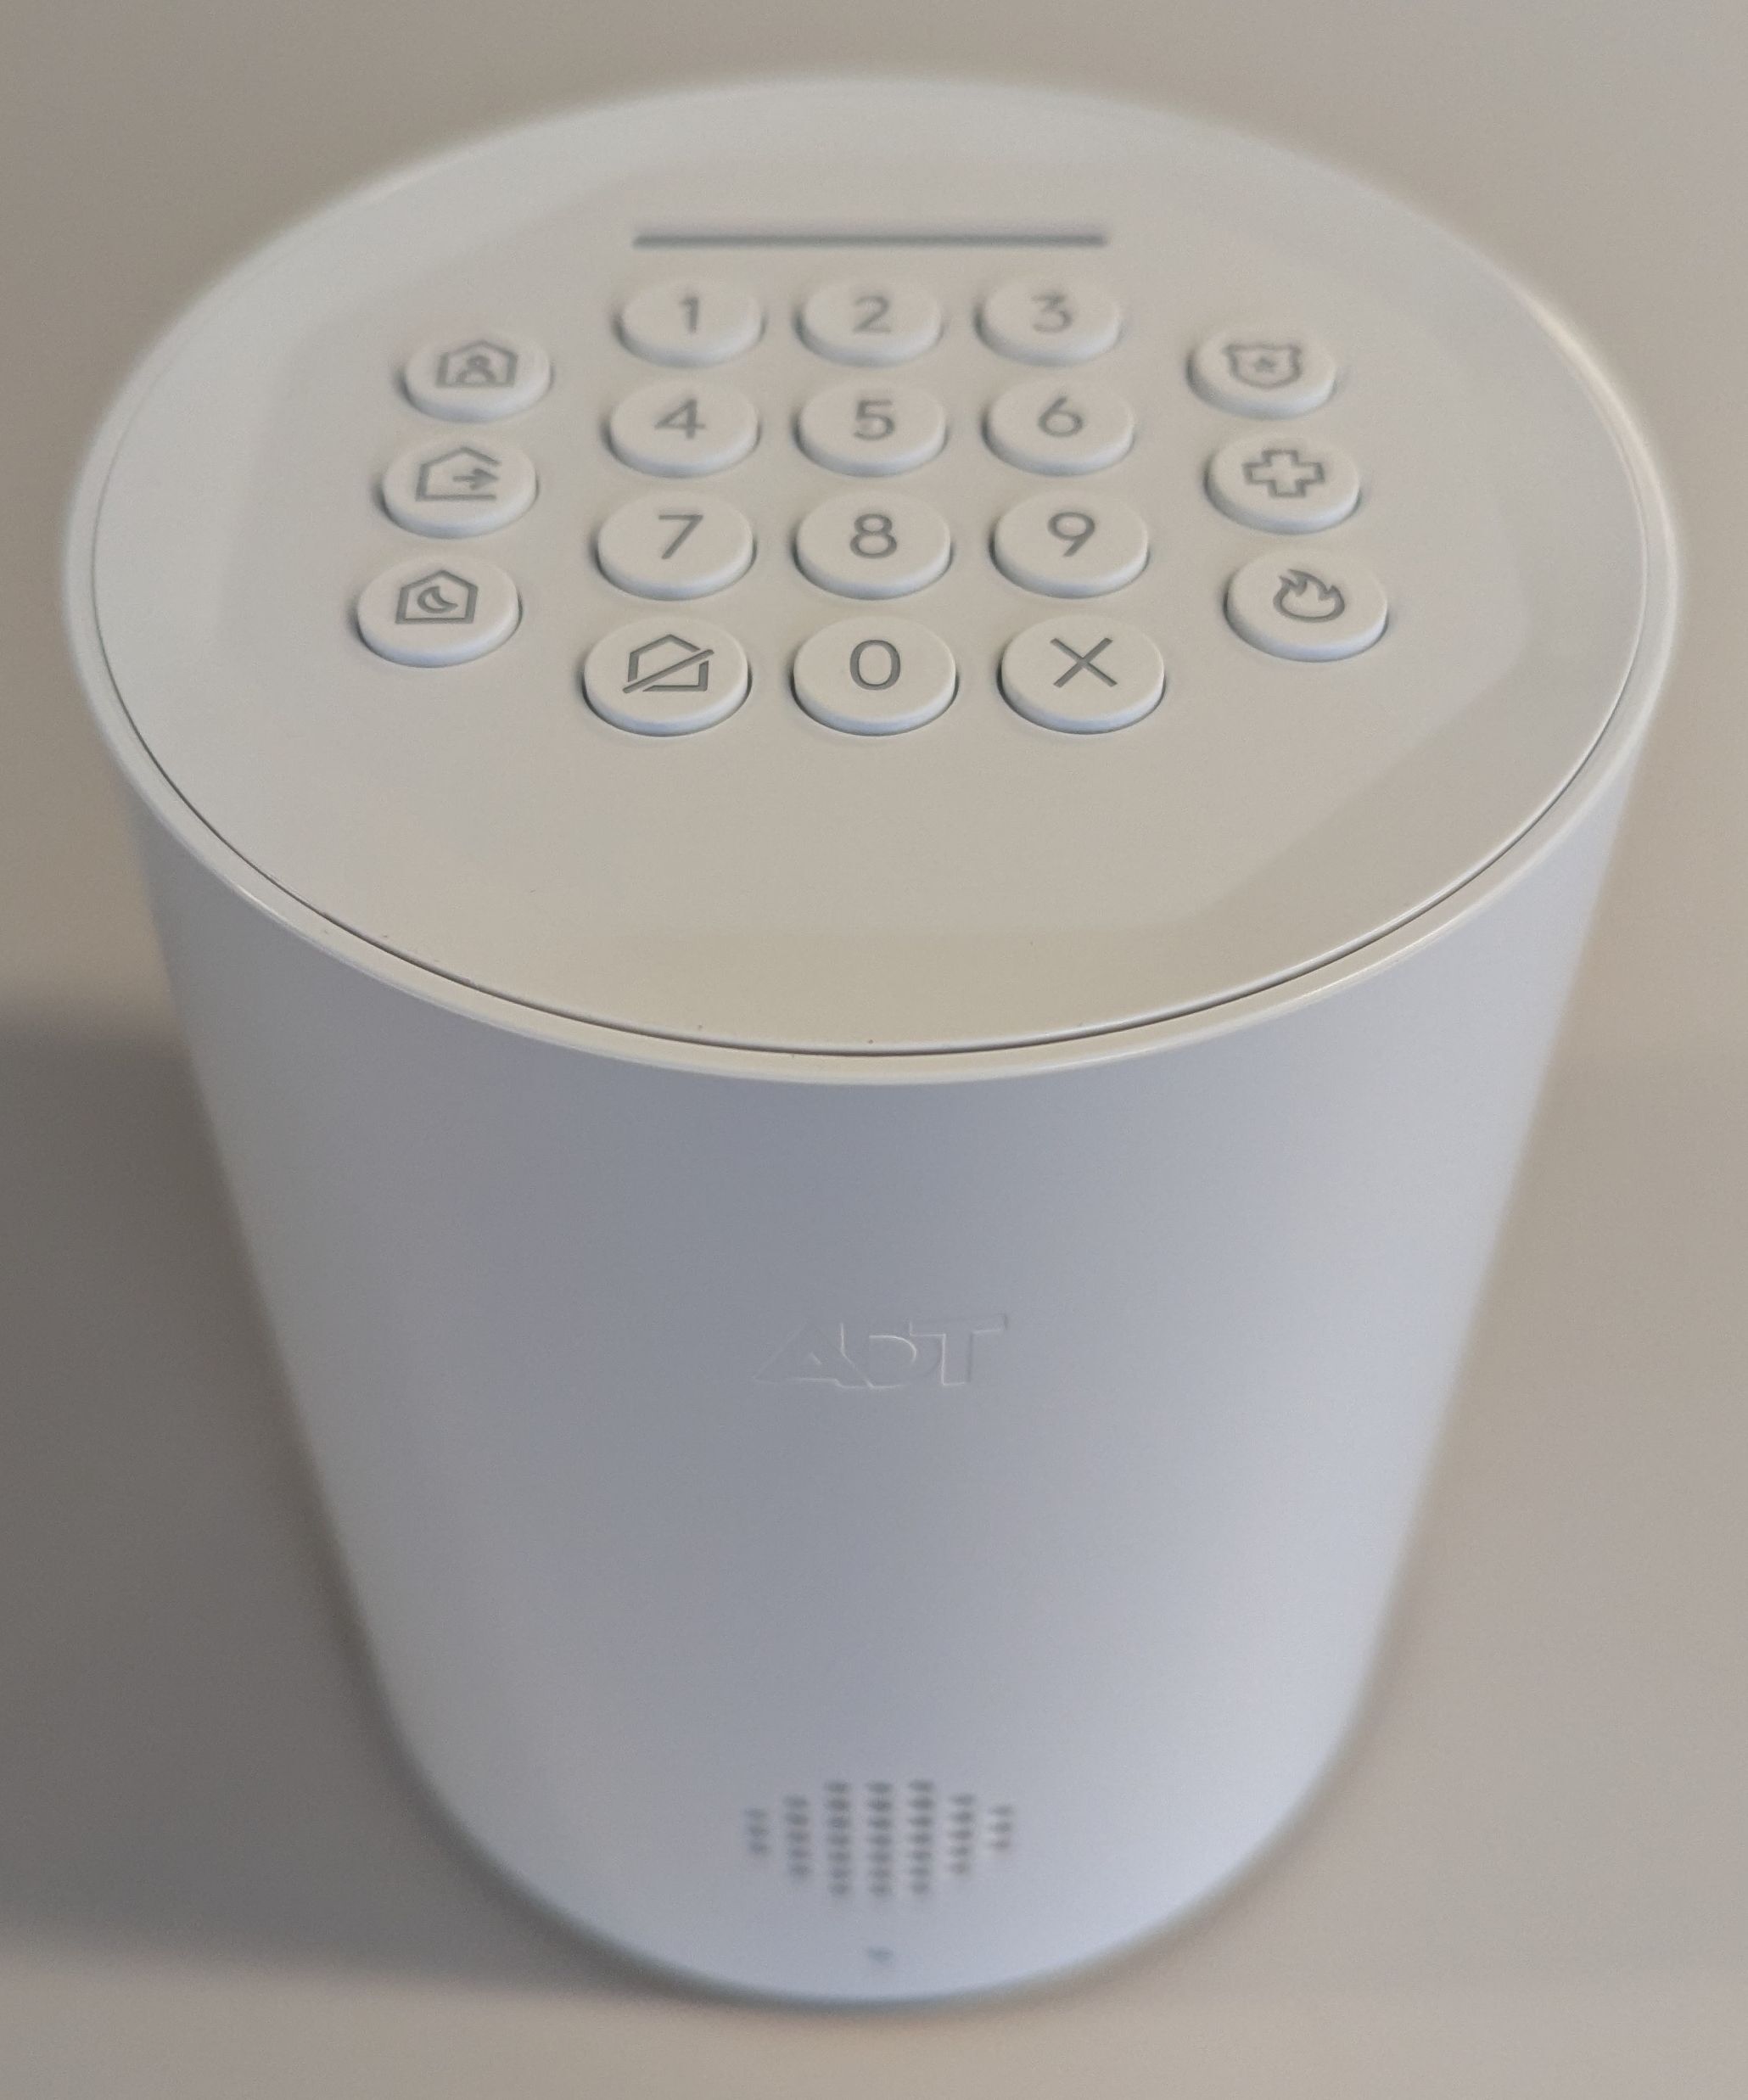
Product Recognition | |
|---|
Certification Number | ZC14-25060526 |
|---|
Name | Base |
|---|
Short Description | The ADT Base is the brains of the security system, providing connectivity for sensors, detectors and Z-Wave® devices with ADT cloud interface via Wi-Fi and cellular network. |
|---|
Description | The ADT Base is the brains of the security system, providing connectivity for sensors, detectors and Z-Wave® devices with ADT cloud interface via Wi-Fi and cellular network. It is intelligent and responsive. It features an integrated keypad that can be used control your system and an LED halo that lets you quickly see the system's status by using different colors, brightness and blink rate. The built-in proximity sensor senses users within a 3ft range and turns on automatically. It is equipped with 24-hour battery backup to help you stay protected 24/7. You can also control your system via the ADT+ app. Use the app to arm or disarm your system, trigger the panic button, and control your Z-Wave® devices at any time. |
|---|
Brand | ADT |
|---|
Identifier | ADTBASE502R0 |
|---|
Product Line | ADT+ |
|---|
OEM Version | HW: 01 FW: 07.22:07.18 |
|---|
Hardware Platform | EFR32ZG23A |
|---|
Z-Wave Version | 7.22.1 |
|---|
Library Type | CONTROLLER_BRIDGE |
|---|
Device Type | Generic Controller DT |
|---|
Role Type | ROLE_TYPE_CONTROLLER_CENTRAL_STATIC |
|---|
Manufacturer ID | 0x0224 |
|---|
Product Type ID | 0x0001 |
|---|
Product ID | 0x0502 |
|---|
User Icon | 0x0500 |
|---|
Installer Icon | 0x0500 |
|---|
Radio Range Z-Wave (m) | 40 |
|---|
Radio Range Z-Wave LR (m) | 400 |
|---|
Frequency Plans | US: 916.00MHz, 908.40MHz, US_LR: 912.00MHz, 920.00MHz |
|---|
Categories | Security Systems |
|---|
Countries / Regions | United States of America |
|---|
Supported Command Classes | Identifier | Name | Key | Version |
|---|
COMMAND_CLASS_APPLICATION_STATUS | Application Status | 0x22 | 1 | COMMAND_CLASS_ASSOCIATION_V3 | Association V3 | 0x85 | 3 | COMMAND_CLASS_ASSOCIATION_GRP_INFO_V3 | Association Group Information (AGI) V3 | 0x59 | 3 | COMMAND_CLASS_DEVICE_RESET_LOCALLY | Device Reset Locally | 0x5A | 1 | COMMAND_CLASS_FIRMWARE_UPDATE_MD_V5 | Firmware Update Meta Data V5 | 0x7A | 5 | COMMAND_CLASS_INDICATOR_V3 | Indicator V3 | 0x87 | 3 | COMMAND_CLASS_MANUFACTURER_SPECIFIC_V2 | Manufacturer Specific V2 | 0x72 | 2 | COMMAND_CLASS_MULTI_CHANNEL_ASSOCIATION_V4 | Multi Channel Association V4 | 0x8E | 4 | COMMAND_CLASS_TIME | Time | 0x8A | 1 | COMMAND_CLASS_VERSION_V3 | Version V3 | 0x86 | 3 | COMMAND_CLASS_ZWAVEPLUS_INFO_V2 | Z-Wave Plus Info V2 | 0x5E | 2 | COMMAND_CLASS_CRC_16_ENCAP | CRC-16 Encapsulation | 0x56 | 1 | COMMAND_CLASS_MULTI_CMD | Multi Command | 0x8F | 1 | COMMAND_CLASS_SECURITY | Security 0 | 0x98 | 1 | COMMAND_CLASS_SECURITY_2 | Security 2 | 0x9F | 1 | COMMAND_CLASS_SUPERVISION | Supervision | 0x6C | 1 | COMMAND_CLASS_TRANSPORT_SERVICE_V2 | Transport Service V2 | 0x55 | 2 | COMMAND_CLASS_INCLUSION_CONTROLLER | Inclusion Controller | 0x74 | 1 | COMMAND_CLASS_NETWORK_MANAGEMENT_PROXY_V4 | Network Management Proxy V4 | 0x52 | 4 | COMMAND_CLASS_NETWORK_MANAGEMENT_BASIC_V2 | Network Management Basic Node V2 | 0x4D | 2 | COMMAND_CLASS_NETWORK_MANAGEMENT_INCLUSION_V4 | Network Management Inclusion V4 | 0x34 | 4 | COMMAND_CLASS_NETWORK_MANAGEMENT_INSTALLATION_MAINTENANCE_V4 | Network Management Installation and Maintenance V4 | 0x67 | 4 | COMMAND_CLASS_NODE_PROVISIONING | Node Provisioning | 0x78 | 1 | COMMAND_CLASS_POWERLEVEL | Powerlevel | 0x73 | 1 |
|
|---|
Controlled Command Classes | Identifier | Name | Key | Version |
|---|
COMMAND_CLASS_BARRIER_OPERATOR | Barrier Operator | 0x66 | 1 | COMMAND_CLASS_BASIC | Basic | 0x20 | 1 | COMMAND_CLASS_SWITCH_BINARY_V2 | Binary Switch V2 | 0x25 | 2 | COMMAND_CLASS_SWITCH_COLOR_V3 | Color Switch V3 | 0x33 | 3 | COMMAND_CLASS_DOOR_LOCK_V4 | Door Lock V4 | 0x62 | 4 | COMMAND_CLASS_METER_V6 | Meter V6 | 0x32 | 6 | COMMAND_CLASS_SENSOR_MULTILEVEL_V11 | Multilevel Sensor V11 | 0x31 | 11 | COMMAND_CLASS_SWITCH_MULTILEVEL_V4 | Multilevel Switch V4 | 0x26 | 4 | COMMAND_CLASS_NOTIFICATION_V8 | Notification V8 | 0x71 | 8 | COMMAND_CLASS_THERMOSTAT_FAN_MODE_V5 | Thermostat Fan Mode V5 | 0x44 | 5 | COMMAND_CLASS_THERMOSTAT_FAN_STATE_V2 | Thermostat Fan State V2 | 0x45 | 2 | COMMAND_CLASS_THERMOSTAT_MODE_V3 | Thermostat Mode V3 | 0x40 | 3 | COMMAND_CLASS_THERMOSTAT_OPERATING_STATE_V2 | Thermostat Operating State V2 | 0x42 | 2 | COMMAND_CLASS_THERMOSTAT_SETPOINT_V3 | Thermostat Setpoint V3 | 0x43 | 3 | COMMAND_CLASS_USER_CODE_V2 | User Code V2 | 0x63 | 2 | COMMAND_CLASS_USER_CREDENTIAL | User Credential | 0x83 | 1 | COMMAND_CLASS_FIRMWARE_UPDATE_MD_V5 | Firmware Update Meta Data V5 | 0x7A | 5 | COMMAND_CLASS_INDICATOR_V3 | Indicator V3 | 0x87 | 3 | COMMAND_CLASS_VERSION_V3 | Version V3 | 0x86 | 3 | COMMAND_CLASS_WAKE_UP_V2 | Wake Up V2 | 0x84 | 2 |
|
|---|
S2 Classes | S2_ACCESS_CONTROL, S2_AUTHENTICATED, S2_UNAUTHENTICATED |
|---|
Documents | Category | File |
|---|
Manual_English | |
|
|---|
Features | Feature | Values |
|---|
Color | | Communications Connections | Value |
|---|
Ethernet (Wireless/WiFi) |
| Firmware Updatable | Value |
|---|
Updatable by Manufacturer |
|
|
|---|
Association Groups | Group Number | Maximum Nodes Supported | End Point ID | Group Name | Profile |
|---|
1 | 1 | 0 | Lifeline | 0x0001 |
|
|---|
Texts | ID | Description | Value |
|---|
23 | Controller Classic Inclusion | Adding a device:
To add a Z-Wave device, go to Settings > Devices > Click on the add button and then select Smart Home Device. You may then select if you would like to add a device using General Inclusion or Smart Start.
Not all Z-Wave devices support SmartStart; however, all Z-Wave devices can still be added using General Inclusion. To continue, select “General Inclusion.” The ADT Base will then go into inclusion mode and, you will be prompted to follow your manufacturer’s instructions to put the device into inclusion mode. Once the device is added you will hear a confirmation beep from your ADT Base, and you will be presented with a screen to name the device and to choose an icon. | 24 | Controller Classic Exclusion | Removing a device:
To remove a device, go to Settings > Devices and choose your device. You can then remove it by clicking remove and following your manufacturer’s directions to put the device into exclusion mode. If a device is not responding, you may fail the remove and then be prompted to remove the failed device. This will remove the device from the network without it being present. If you would like to add your device to another system, then you will need to reset the device per the manufacturer’s instructions. You can use the general exclusion for resetting devices as well under Settings > Devices > Go to your ADT Base > Select advanced settings, and then click General Exclusion. | 11 | Controller SmartStart Inclusion | Adding a device:
To add a Z-Wave device, go to Settings > Devices > Click on the add button and then select Zwave device. You may then select if you would like to add a device using General Inclusion or Smart Start.
Z-Wave SmartStart enabled products can be added into a Z-Wave network by scanning the Z-Wave QR Code present on the product with a controller providing SmartStart inclusion. No further action is required and the SmartStart product will be added automatically within 10 minutes of being switched on in the network vicinity. To access the SmartStart Provisioning list, continue by selecting “Smart Start.” From there you can add a device by selecting “+” and then either selecting Manually or Scan QR Code and follow the prompts. When manually entering the DSK, you may also select a bootstrapping mode. For devices that support Z-Wave Long Range, you can use the long-range option to ensure the device is included using Z-Wave Long Range. Once a SmartStart device has been successfully added its DSK (Device Specific Key) and status will show up on the SmartStart Provisioning screen. To remove a SmartStart provisioned device from the screen, swipe it left and you will be asked to Confirm or Cancel the request for SmartStart. | 25 | Controller Provisioning List | Z-Wave SmartStart enabled products can be added into a Z-Wave network by scanning the Z-Wave QR Code present on the product with a controller providing SmartStart inclusion. No further action is required and the SmartStart product will be added automatically within 10 minutes of being switched on in the network vicinity. To access the SmartStart Provisioning list, continue by selecting “Smart Start.” From there you can add a device by selecting “+” and then either selecting Manually or Scan QR Code and follow the prompts. When manually entering the DSK, you may also select a bootstrapping mode. For devices that support Z-Wave Long Range, you can use the long-range option to ensure the device is included using Z-Wave Long Range. Once a SmartStart device has been successfully added its DSK (Device Specific Key) and status will show up on the SmartStart Provisioning screen. To remove a SmartStart provisioned device from the screen, swipe it left and you will be asked to Confirm or Cancel the request for SmartStart. | 10 | Controller Replication | Copying your Z-Wave network information to another controller:
If you would like to copy your network information to another controller, you must add the controller to the Z-Wave network using the normal device add process. Once the controller has been successfully added to the Z-Wave network, all network configurations will be automatically transferred to the new controller. | 5 | Factory Reset Procedure | Resetting your Z-Wave network:
If this controller is the primary controller for your network, resetting it will result in the nodes in your network being orphaned and it will be necessary after the reset to exclude and re-include all of the nodes in the network. If this controller is being used as a secondary controller in the network, use this procedure to reset this controller only in the event that the network primary controller is missing or otherwise inoperable. In order to factory reset your Z-Wave network, go to Settings > Devices > Choose your ADT Base > Open Advanced Settings and then select Z-Wave Reset Controller. After a few seconds, the ADT Base will beep to indicate that your Z-Wave network has been reset. Any devices which were part of your Z-Wave network will need to be reset before they can be re-added. Use the Z-Wave General Exclusion menu under Settings > Devices > Choose your ADT Base > Open Advanced Settings to do this. |
|
|---|
Supports NWI | Yes |
|---|
Supports Explorer Frames | Yes |
|---|
Supports SmartStart | Yes |
|---|