| Product Recognition | |
|---|
| Certification Number | ZC10-16055088 |
|---|
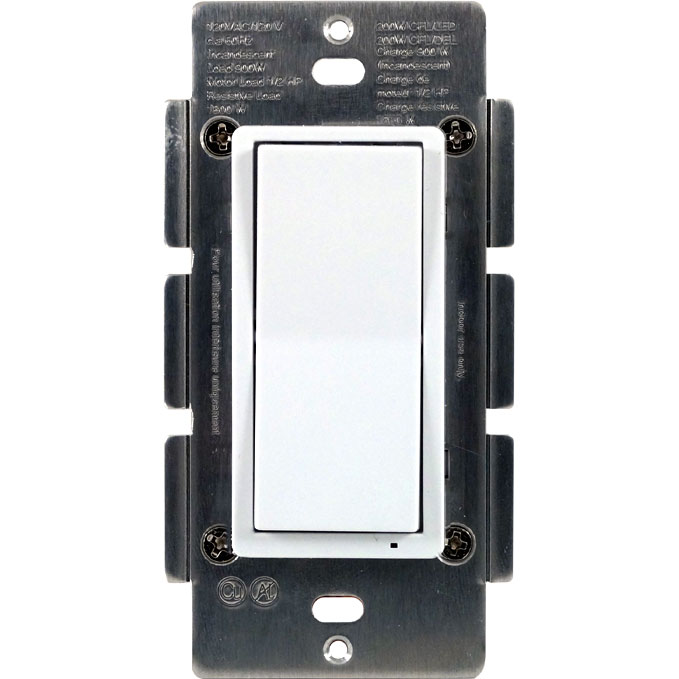
| Name | HS-WS100+ Wall Switch |
|---|
| Short Description | HS-WS100+ is a Z-Wave Plus certified wall switch that provides on-off control of most lighting and appliance loads. |
|---|
| Long Description | HS-WS100+ In Wall On/Off Switch
• Supports wireless on-off control of lighting and appliance loads
• Z-Wave Plus certified for easy inclusion and reliable communications
• Compatible with HomeSeer (and many other) home controllers
• Includes double-tap, triple-tap, press & hold event features to trigger up to 6 different home automation events
• Supports Z-Wave central scene technology
• Supports instant status when controlled locally
• Easy 'screw terminal' installation |
|---|
| Brand | HomeSeer |
|---|
| Product Identifier | HS-WS100+ |
|---|
| OEM Version | HW: 255 FW: 5013 |
|---|
| Hardware Platform | ZM5202 |
|---|
| Z-Wave Version | 6.51.06 |
|---|
| Library Type | SLAVE_ENHANCED_232 |
|---|
| Device Type | On/Off Power Switch |
|---|
| Role Type | ROLE_TYPE_SLAVE_ALWAYS_ON |
|---|
| Manufacturer ID | 0x000C |
|---|
| Product Type ID | 0x4447 |
|---|
| Product ID | 0x3034 |
|---|
| User Icon | 0x0600 |
|---|
| Installer Icon | 0x0600 |
|---|
| Frequency Plans | US: 916.00MHz, 908.40MHz |
|---|
| Categories | All Lighting Devices, On/Off Switches/Devices |
|---|
| Countries / Regions | United States of America |
|---|
| Controlled Command Classes | | Identifier | Name | Key | Version |
|---|
| COMMAND_CLASS_CENTRAL_SCENE_V2 | Central Scene V2 | 0x5B | 2 |
|
|---|
| Documents | |
|---|
| Association Groups | | Group Number | Maximum Nodes Supported | End Point ID | Description |
|---|
| 1 | 5 | 0 | Z-Wave Plus Lifeline |
|
|---|
| Configuration Parameters | | Parameter Number | Name | Description | Format | Size | Min Value | Max Value | Default Value | Parameter Values |
|---|
| 3 | LED indicator | the LED indicator will be ON when the connected appliance is ON, and vice versa. | 0 | 1 | 0 | 0 | 0 | | From | To | Description |
|---|
| 0 | 0 | the LED indicator will be OFF when the connected appliance is ON, and the LED indicator will be ON when the connected appliance is OFF | | 1 | 1 | the LED indicator will be OFF when the connected appliance is OFF, and the LED indicator will be ON when the connected appliance is ON | | 2 | 2 | the LED indicator will be always Off regardless of the load status |
| | 4 | Orientation of the ON/OFF on the rocker switch can be inverted | the orientation of the ON/OFF on the rocker switch can be inverted by changing the following configuration with a controller(if supported) | 0 | 1 | 0 | 0 | 0 | | From | To | Description |
|---|
| 0 | 0 | the connected light will turn ON by pressing the top side of the rocker switch and turn OFF by pressing the bottom side. | | 1 | 1 | the connected light will turn OFF by pressing the top side of the rocker switch and turn ON by pressing the bottom side. |
|
|
|---|
| Texts | | ID | Description | Value |
|---|
| 2 | Exclusion | 1. Turn the connected appliance ON/OFF by tapping the switch. Tapping and releasing the upper part of the rocker turns the appliance ON. Tapping and releasing the lower part of the rocker turns the appliance OFF.
2. Delete(Exclude) the module to/from your Z-Wave network with your primary controller. Please refer to the instructions manual of your gateway or remote controller for details and procedures on how these actions can be done. Normally, the sequence is as follows: when the exclusion process is prompted by your primary controller, single click and release the rocker switch. The controller should show that the action was successful. If the controller shows it was a fail, repeat the procedure. | | 1 | Inclusion | 1. Turn the connected appliance ON/OFF by tapping the switch. Tapping and releasing the upper part of the rocker turns the appliance ON. Tapping and releasing the lower part of the rocker turns the appliance OFF.
2. Add(Include) the module to/from your Z-Wave network with your primary controller. Please refer to the instructions manual of your gateway or remote controller for details and procedures on how these actions can be done.
3. Normally, the sequence is as follows: when the inclusion process is prompted by your primary controller, single click and release the rocker switch to ON or OFF position. The controller should show that the action was successful. If the controller shows it was a fail, repeat the procedure. | | 5 | Factory Reset | Please use this procedure only in the event that the network primary controller is lost or otherwise inoperable.
All Configuration Parameters can all be restored to their factory
default settings by using your primary controller to delete/reset
the device. To manually reset, tap the ON button twice quickly and then tap the OFF button twice quickly. Repeat the procedure to restore the settings to the factory default. | | 6 | Additional Special Features | Z-Wave Plus introduces a new process for scene activation – “Central Scene
Control”. Press and release the button, it will send a certain command to the central controller via the lifeline association group 1. This allows the controller to react to key pressed, key released and key held down.
- Press and release the top button, “Scene 001 Key Pressed” preset by the Gateway will be turned ON.
- Press the top button twice, “Scene 001 Key Pressed Twice” preset by the Gateway will be turned ON.
- Press the top button 3 times, “Scene 001 Key Pressed 3 Times” preset by the Gateway will be turned ON.
- Press and release the bottom button, “Scene 002 Key Pressed” preset by the Gateway will be turned ON.
- Press the bottom button twice, “Scene 002 Key Pressed Twice” preset by the Gateway will be turned ON.
- Press the bottom button 3 times, “Scene 002 Key Pressed 3 Times” preset by the Gateway will be turned ON. |
|
|---|
| Supports NWI | Yes |
|---|
| Supports Explorer Frames | Yes |
|---|