| Product Recognition | |
|---|
| Certification Number | ZC10-14020001 |
|---|
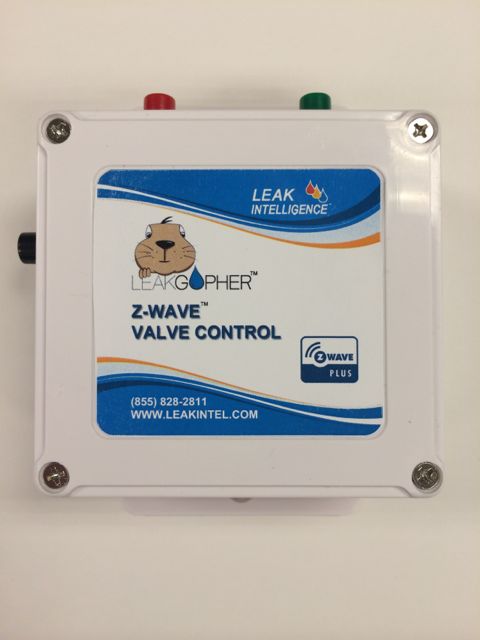
| Name | Leak Gopher Z-Wave Valve Controller |
|---|
| Short Description | Electronic water valve to turn water off when leaks are detected by water sensors attached to a Z-Wave controller. Also allows remote control of water using any Z-Wave controller. |
|---|
| Long Description | The Leak Gopher Z-Wave Valve Controller is a professionall grade Z-Wave Device that allows the water to your home or business to be automatically turned off when water is detected by water sensors connected to any Z-Wave capable controller. The Leak Gopher Z-Wave Valve Controller is Z-Wave Plus compliant allowing you to use all of the functionality and programmability built into the new, Z-Wave Plus Controllers. It comes with a Stainless Steel Electronic Ball Valve.
Design and Operation of
The Leak Gopher Valve Controller
Simply install the stainless steel Electronic Ball Valve on the ½” or ¾” water line where water enters your home or business, attach it to the Leak Gopher by plugging in the RJ-11 telephone jack, and tell your Z-Wave controller about the Leak Gopher and your home or business is protected.
Standard telephone wires and connectors can be used to extend the Ball Valve’s wire so it is easy to locate the Electronic Ball Valve where you need it to be, and still have easy access to the Leak Gopher Z-Wave Valve Controller.
When any of your water sensors get wet, your Z-Wave Controller will tell the Leak Gopher to turn the water off and Voilà! No Flood!
A fully capable Z-Wave device, you can also program scenes that allow your Leak Gopher to turn the water off when you leave home and arm your security system and back on when you get home. No more worries about your house flooding while you are away.
Also, for your convenience and piece of mind, there are two buttons on the Leak Gopher that allow you to instantly turn your water off and on. No more looking for that water key and digging in the yard looking for your water meter! |
|---|
| Brand | Leak Gopher |
|---|
| Product Identifier | LGZW-1 |
|---|
| OEM Version | 01 |
|---|
| Hardware Platform | ZM5202 |
|---|
| Z-Wave Version | 6.51.00 |
|---|
| Library Type | SLAVE_ENHANCED_232 |
|---|
| Device Type | Valve - Open/Close |
|---|
| Role Type | ROLE_TYPE_SLAVE_ALWAYS_ON |
|---|
| Manufacturer ID | 0x0173 |
|---|
| Product Type ID | 0x0003 |
|---|
| Product ID | 0x0002 |
|---|
| Frequency Plans | US: 916.00MHz, 908.40MHz |
|---|
| Categories | Water Valves & Irrigation |
|---|
| Countries / Regions | United States of America |
|---|
| Documents | |
|---|
| Association Groups | | Group Number | Maximum Nodes Supported | End Point ID | Description |
|---|
| 1 | 1 | 0 | Lifeline group |
|
|---|
| Texts | | ID | Description | Value |
|---|
| 5 | Factory Reset | How to reset the Leak Gopher Z-Wave Valve Control.
- To reset the Leak Gopher Z-Wave Valve Control Z-Wave radio and routing table, press and hold the Add/Remove button located on the side of the Leak Gopher Z-Wave Valve Control for 15 seconds. | | 6 | Additional Special Features | How to turn water on and off manually
- Plug the wall cube power adapter (included) into the receptacle on the bottom of the Leak Gopher Z-Wave Valve Control marked “3.6 VDC”. Plug the wall cube into a 110 VAC outlet. This provides power to the Leak Gopher Z-Wave Valve Control.
- Plug the Leak Gopher electronic ball valve into the RJ-11 (telephone type connector) connector located on the bottom of the Leak Gopher Z-Wave Valve Control.
- Standard telephone wires, extenders, and connectors with RJ-11 connectors can be used to extend the distance between the Leak Gopher Z-Wave Valve Control and the Leak Gopher electronic ball valve. The maximum recommended distance between the Leak Gopher Z-Wave Valve Control and the Leak Gopher electronic ball valve is 30 feet. | | 1 | Inclusion | How to Add the Leak Gopher Z-Wave Valve Control to your Z-Wave Controller
- Plug the wall cube power adapter (included) into the receptacle on the bottom of the Leak Gopher Z-Wave Valve Control marked “3.6 VDC”. Plug the wall cube into a 110 VAC outlet. This provides power to the Leak Gopher Z-Wave Valve Control.
- Configure the Z-Wave Controller to Add a device.
- When the Z-Wave Controller is ready to add a device, it will display a message like “waiting to add device. Press Add button on the device”
- The Add/Remove button is located on the side of the Leak Gopher Z-Wave Valve Control. Press the Add/Remove button.
- The Z-Wave Controller will acknowledge that the Leak Gopher Z-Wave Valve Control had been added to the Z-Wave network.
- Your Leak Gopher Z-Wave Valve Control is ready to use. | | 2 | Exclusion | How to Remove the Leak Gopher Z-Wave Valve Control to your Z-Wave Controller
- Plug the wall cube power adapter (included) into the receptacle on the bottom of the Leak Gopher Z-Wave Valve Control marked “3.6 VDC”. Plug the wall cube into a 110 VAC outlet. This provides power to the Leak Gopher Z-Wave Valve Control.
- Configure the Z-Wave Controller to Remove a device.
- When the Z-Wave Controller is ready to Remove a device, it will display a message like “waiting to remove device. Press remove button on the device”
- The Add/Remove button is located on the side of the Leak Gopher Z-Wave Valve Control. Press the Add/Remove button.
- The Z-Wave Controller will acknowledge that the Leak Gopher Z-Wave Valve Control had been removed from the Z-Wave network.
- Your Leak Gopher Z-Wave Valve Control is removed form this controller. |
|
|---|
| Supports NWI | Yes |
|---|
| Supports Explorer Frames | Yes |
|---|