| Product Recognition | |
|---|
| Certification Number | ZC10-15010002 |
|---|
| Name | Multireg Z-Wave |
|---|
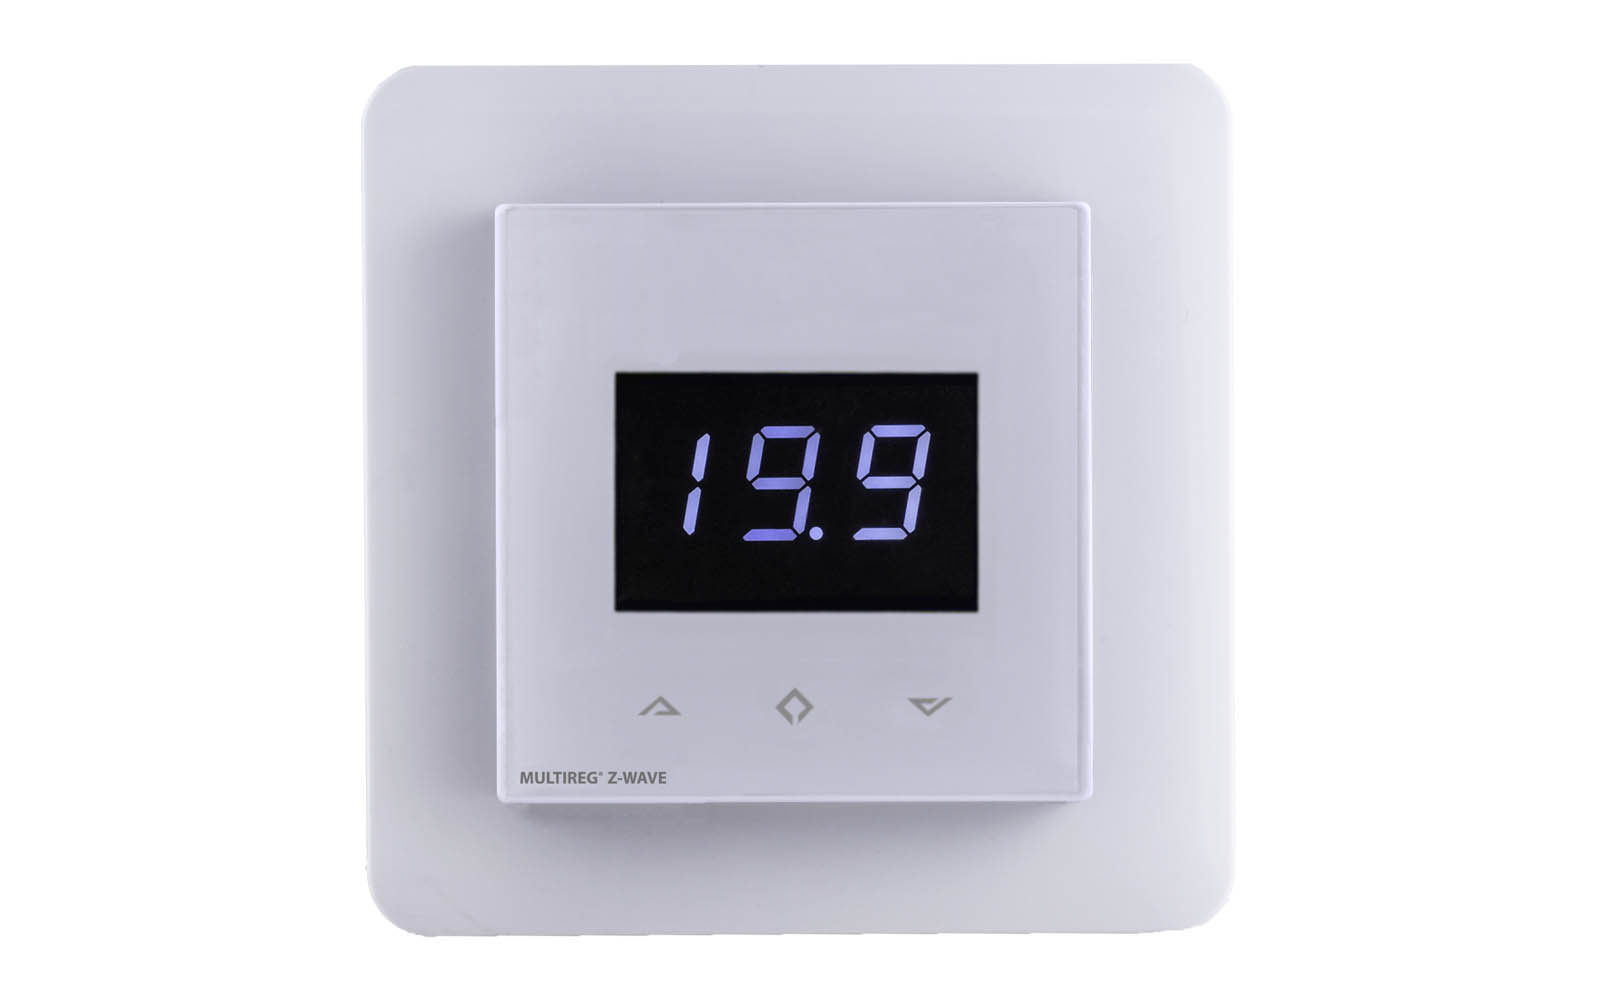
| Short Description | Heatit Z-Wave is an electronic thermostat for mounting in a standard wall box. The thermostat has a built-in Z-Wave chip that can be connected to Home Automation systems like Fibaro, Sensio, Vera, Zipato and others.
Heatit Z-Wave is equipped with a single-pole switch. The thermostat can handle loads up to 16A/3600W at 230V. |
|---|
| Long Description | Heatit Z-Wave is an electronic thermostat for mounting in a standard wall box. The thermostat has a built-in Z-Wave chip that can be connected to Home Automation systems like Fibaro, Sensio, Vera, Zipato and others.
The display will show the actual room temperature.
By pressing the buttons, the display will show the set value.
Heatit Z-Wave is equipped with a single-pole switch. The thermostat can handle loads up to 16A/3600W at 230V.
If the load is greater than this, the thermostat needs to be connected to a contactor. It can be used with two external temperature sensors.
Functions:
• Room sensor
• Floor sensor
• Temperature limiter
• Power regulator
• Z-Wave chip 500 series
• Week program/setback temperature via gateway
• Setback mode
• 7-segment white LCD-screen
• Can be used in connection with different NTC-sensors
• Lock mode/child lock
• Backlight
• Calibration
• 8 scenarios
CONNECTION CLAMPS
Use 1,5 mm² or 2,5 mm² cables according to power need.
TECHNICAL DATA
Rated voltage: 230 V 50/60 Hz
Max. load: 3600W
Max. current: 16A
Power consumption: 1,5W
Protection class: IP21
Min/Max installation temp: -20°C to 40°C
Min/Max operating temp: 5°C to 40°C
Temperature intervals: Floor sensor 5°C to 40°C
Room sensor 5°C to 40°C
Hysteresis: 0,5°C
Sensor values: 0°C 29,1 kOhm
10°C 18,6 kOhm
15°C 15,1 kOhm
20°C 12,2 kOhm
25°C 10,0 kOhm
Breaker: Single-pole |
|---|
| Brand | Thermo-Floor AS |
|---|
| Product Identifier | TF016 |
|---|
| OEM Version | 01 |
|---|
| Hardware Platform | ZM5202 |
|---|
| Z-Wave Version | 6.51.00 |
|---|
| Library Type | SLAVE_ROUTING |
|---|
| Device Type | Thermostat - HVAC |
|---|
| Role Type | ROLE_TYPE_SLAVE_ALWAYS_ON |
|---|
| Manufacturer ID | 0x019B |
|---|
| Product Type ID | 0x0001 |
|---|
| Product ID | 0x0001 |
|---|
| Frequency Plans | EU: 869.85MHz, 868.40MHz |
|---|
| Categories | Thermostats |
|---|
| Countries / Regions | European Union |
|---|
| Controlled Command Classes | | Identifier | Name | Key | Version |
|---|
| COMMAND_CLASS_BASIC | Basic | 0x20 | 1 |
|
|---|
| Documents | |
|---|
| Association Groups | | Group Number | Maximum Nodes Supported | End Point ID | Description |
|---|
| 1 | 8 | 0 | Z-Wave Plus Lifeline |
|
|---|
| Texts | | ID | Description | Value |
|---|
| 1 | Inclusion | Inclusion/exclusion mode
To include the thermostat to your home automation gateway, press the Center (confirm) button for 10 seconds.
The display will show OFF. Press Right (down) button 4 times till you see Con in the display.
Now start adding device in your home automation software.
Start inclusion mode by pressing Center (confirm) button for approximately 2 seconds. The inclusion/exclusion icon will appear in the display.
Confirmation will show Inc/EcL in the display.
If inclusion fails, Err (error) will appear. | | 2 | Exclusion | Inclusion/exclusion mode
To include the thermostat to your home automation gateway, press the Center (confirm) button for 10 seconds.
The display will show OFF. Press Right (down) button 4 times till you see Con in the display.
Now start adding device in your home automation software.
Start inclusion mode by pressing Center (confirm) button for approximately 2 seconds. The inclusion/exclusion icon will appear in the display.
Confirmation will show Inc/EcL in the display.
If inclusion fails, Err (error) will appear. | | 4 | Device Wake-Up | If Er2 appears in the display, touch any button to restart the display. | | 5 | Factory Reset | Factory reset - RES:
By pressing buttons Left and Center(up and confirm) for 20 seconds, the thermostat will perform a complete factory reset.
NB! Please use this procedure only when the primary controller is missing or otherwise inoperable. |
|
|---|
| Supports NWI | Yes |
|---|
| Supports Explorer Frames | Yes |
|---|