Product Recognition | |
|---|
Certification Number | ZC10-17075697 |
|---|
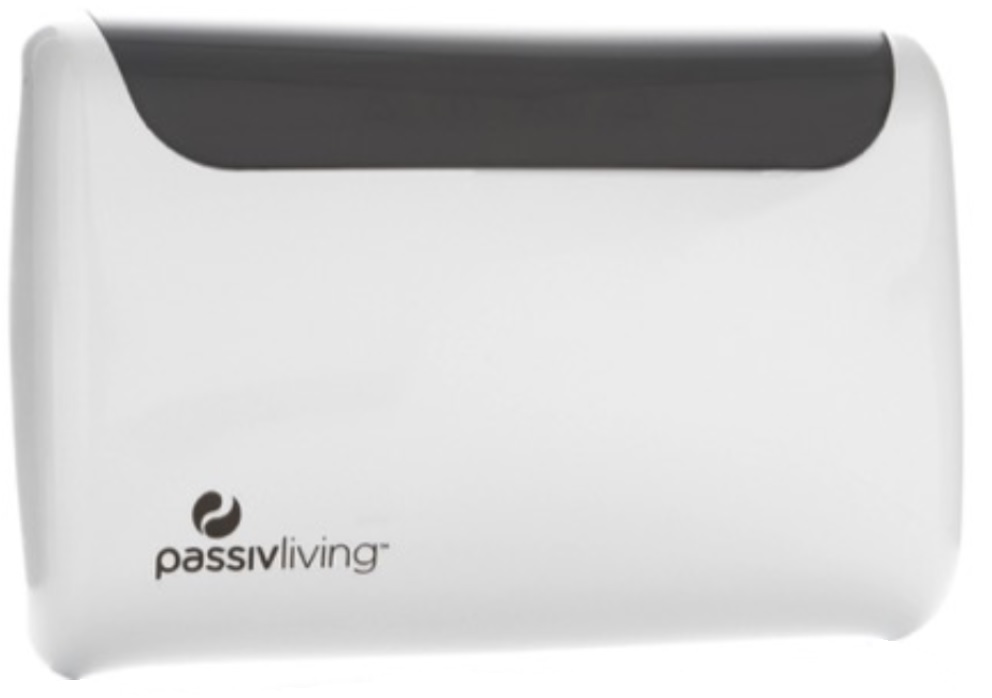
Name | PassivLiving Hub |
|---|
Short Description | PassivLiving Hub is an in-home appliance that manages a home area network of sensors and actuators. |
|---|
Long Description | PassivLiving Hub is an in-home appliance that manages a home area network of sensors and actuators. It hosts intelligent energy management applications to provide monitoring and control for the home. The "always on" server connection state enables remote connection for several tasks, including control by consumers smartphone, information delivery to the hub (for example weather feeds), diagnostics, alerts and smart grid demand management requests. |
|---|
Brand | PassivLiving |
|---|
Product Identifier | PL-HB1-ZW |
|---|
OEM Version | HW: 1 FW: 4.33:01.03 |
|---|
Hardware Platform | ZM5202 |
|---|
Z-Wave Version | 6.61.00 |
|---|
Library Type | CONTROLLER_STATIC |
|---|
Device Type | Gateway |
|---|
Role Type | ROLE_TYPE_CONTROLLER_CENTRAL_STATIC |
|---|
Manufacturer ID | 0x0172 |
|---|
Product Type ID | 0x0001 |
|---|
Product ID | 0x0001 |
|---|
User Icon | 0x0500 |
|---|
Installer Icon | 0x0500 |
|---|
Frequency Plans | EU: 869.85MHz, 868.40MHz |
|---|
Categories | All Controllers, Gateway Controller |
|---|
Countries / Regions | European Union |
|---|
Supported Command Classes | Identifier | Name | Key | Version |
|---|
COMMAND_CLASS_POWERLEVEL | Powerlevel | 0x73 | 1 | COMMAND_CLASS_APPLICATION_STATUS | Application Status | 0x22 | 1 | COMMAND_CLASS_CRC_16_ENCAP | CRC16 Encapsulation | 0x56 | 1 | COMMAND_CLASS_SECURITY | Security S0 | 0x98 | 1 | COMMAND_CLASS_VERSION_V2 | Version V2 | 0x86 | 2 | COMMAND_CLASS_DEVICE_RESET_LOCALLY | Device Reset Locally | 0x5A | 1 | COMMAND_CLASS_ZWAVEPLUS_INFO_V2 | Z-Wave Plus Info V2 | 0x5E | 2 | COMMAND_CLASS_ASSOCIATION_V2 | Association V2 | 0x85 | 2 | COMMAND_CLASS_ASSOCIATION_GRP_INFO | Association Group Info | 0x59 | 1 | COMMAND_CLASS_MANUFACTURER_SPECIFIC | Manufacturer Specific | 0x72 | 1 |
|
|---|
Controlled Command Classes | Identifier | Name | Key | Version |
|---|
COMMAND_CLASS_MULTI_CHANNEL_ASSOCIATION_V3 | Multi-Channel Association V3 | 0x8E | 3 | COMMAND_CLASS_BATTERY | Battery | 0x80 | 1 | COMMAND_CLASS_THERMOSTAT_MODE | Thermostat Mode | 0x40 | 1 | COMMAND_CLASS_SENSOR_MULTILEVEL | Sensor Multilevel | 0x31 | 1 | COMMAND_CLASS_SWITCH_BINARY | Switch Binary | 0x25 | 1 | COMMAND_CLASS_BASIC | Basic | 0x20 | 1 | COMMAND_CLASS_CONFIGURATION | Configuration | 0x70 | 1 | COMMAND_CLASS_CRC_16_ENCAP | CRC16 Encapsulation | 0x56 | 1 | COMMAND_CLASS_SECURITY | Security S0 | 0x98 | 1 | COMMAND_CLASS_VERSION_V2 | Version V2 | 0x86 | 2 | COMMAND_CLASS_WAKE_UP_V2 | Wake Up V2 | 0x84 | 2 | COMMAND_CLASS_ZWAVEPLUS_INFO_V2 | Z-Wave Plus Info V2 | 0x5E | 2 | COMMAND_CLASS_ASSOCIATION_V2 | Association V2 | 0x85 | 2 | COMMAND_CLASS_MULTI_CHANNEL_V4 | Multi-Channel V4 | 0x60 | 4 | COMMAND_CLASS_THERMOSTAT_SETPOINT | Thermostat Setpoint | 0x43 | 1 | COMMAND_CLASS_MANUFACTURER_SPECIFIC | Manufacturer Specific | 0x72 | 1 | COMMAND_CLASS_METER_V2 | Meter V2 | 0x32 | 2 |
|
|---|
Documents | Category | Description | File |
|---|
Manual_Primary_Lang | Product or Owner's Manual | |
|
|---|
Features | Feature | Values |
|---|
Outdoor Use | | Color | | Communications Connections | Value |
|---|
Ethernet (Wired) | USB (Universal Serial Bus) |
| Sensors | |
|
|---|
Association Groups | Group Number | Maximum Nodes Supported | End Point ID | Description |
|---|
1 | 6 | 0 | Z-Wave Plus Lifeline (reset command notification only) |
|
|---|
Texts | ID | Description | Value |
|---|
23 | Controller Inclusion | Extract from PassivLiving Hub User Guide:
4.3. Adding devices
To add a device to the hub, the hub must be deactivated and placed into add mode (sometimes called Inclusion) and the new device should be placed into join or learn mode. You can add Z-Wave devices from other manufacturers to your hub. You can also add devices that are not related to heating - which means that the hub can act as a repeater for them. For instance a light device and dimmer switch could both be added to the hub’s network and share their routing capabilities.
1. Access the hub configuration portal (see 3. Hub Z-Wave Configuration Portal )
2. Deactivate your hub (see 4.1. Activating / deactivating your hub )
3. Press the “Add” button on the portal. This will put the hub into add mode for 20 seconds.
4. Follow the manufacturer's instructions for adding the Z-Wave device
5. If successful a new device should show up in the portal.
6. If the device is capable of providing heating functionality (eg thermostat) then you will have the opportunity to select a role if you wish (see 4.2. Hub Heating Roles and
Zones. ). If the device cannot be used for heating, it will be listed as
“UNKNOWN_GENERIC_DEVICE_TYPE” - which indicates it is an additional Z-Wave
ecosystem device.
7. If you are not making further changes to devices - you can re-activate your hub. | 24 | Controller Exclusion | Extract from PassivLiving Hub User Guide:
4.4. Removing devices
To remove a device from the hub, the hub must be placed into remove mode (sometimes called Exclusion) and the new device should be placed into leave or learn mode.
1. Access the hub configuration portal (see 3. Hub Z-Wave Configuration Portal )
2. Deactivate your hub (see 4.1. Activating / deactivating your hub )
3. Press the “Remove” button on the portal. This will put the hub into remove mode for 20 seconds.
4. Follow the manufacturer's instructions for removing the Z-Wave device
5. If successful the device should be removed from the portal.
6. If you are not making further changes to devices - you can re-activate your hub.
Note: If you have removed a device that is important to your heating, your hub may not be able to control your heating. Please refer to 4.7. Pre-installed devices and also 4.2. Hub Heating Roles and Zones. | 3 | Learn Mode (adding another controller) | Extract from PassivLiving Hub User Guide:
4.7.4. Adding the hub to a different network
To add the Hub to a different network follow these steps:
1. Put the new network’s controller into add mode (please refer to the user guide for
your Z-Wave network controller)
2. Press the “Learn” button on the “Joining Tool” tab in the configuration portal.
Once your Hub has joined the new network - devices already in that network will be
visible in the portal. Any devices that can be used for heating will offer the option to
select roles (see 4.2. Hub Heating Roles and Zones). | 5 | Factory Reset | Extract from PassivLiving Hub User Guide:
4.7.8. Factory reset hub
You can reset the hubs Z-Wave network by pressing the reset button in the configuration portal. This will remove all devices from your network and your heating will not function. If this controller is the primary controller for your network, resetting it will result in the nodes in your network being orphaned and it will be necessary after the reset to exclude and re-include all of the nodes in the network. If this controller is being used as a secondary controller in the network, use this procedure to reset this controller only in the event that the network primary controller is missing or otherwise inoperable. You can add back in your default devices and configure them by
referring to the sections 4.7. Pre-installed devices , 4.3. Adding devices , 4.2. Hub Heating Roles and Zones and 4.1. Activating / deactivating your hub . |
|
|---|
Supports NWI | Yes |
|---|
Supports Explorer Frames | Yes |
|---|