| Product Recognition | |
|---|
| Certification Number | ZC14-25020501 |
|---|
| Name | RisControl Smart Home Z-Wave Controller |
|---|
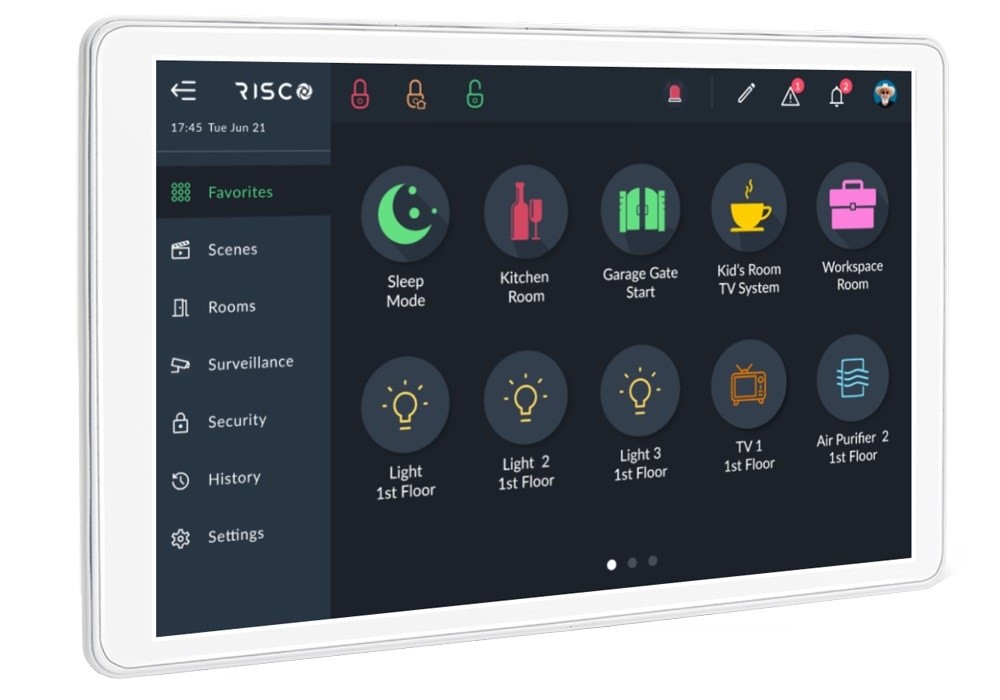
| Short Description | RisControl is a high-resolution Smart Touchscreen Keypad with an intuitive, easy to navigate user interface. RisControl combines standard keypad functionality with the ability to operate RISCO’s Smart Home cloud-based solution, and alarm and video, from one customizable screen. |
|---|
| Long Description | RisControl is a high-resolution Smart Touchscreen Keypad with an intuitive, easy to navigate user interface. RisControl combines standard keypad functionality with the ability to operate RISCO’s Smart Home cloud-based solution, and alarm and video, from one customizable screen.
The RisControl can be used in 3 operation modes, as follows:
•
Smart Home + Security –RisControl is connected to a control panel via the RS-485 bus. For Smart Home operation, RisControl is connected to other RisControl units and to the RISCO Cloud via Wi-Fi
•
Smart Home Only–RisControl is connected to other RisControl units (and to the RISCO Cloud) via Wi-Fi
•
Security Only- RisControl is connected to a control panel via the RS-485 bus and to the RISCO Cloud via Wi-Fi |
|---|
| Brand | RISCO Ltd. |
|---|
| Product Identifier | RisControlZW100 |
|---|
| Product Line | RisControl |
|---|
| OEM Version | HW: 01 FW: 02.05:02.05 |
|---|
| Hardware Platform | EFR32ZG23A |
|---|
| Z-Wave Version | 7.22.1 |
|---|
| Library Type | CONTROLLER_BRIDGE |
|---|
| Device Type | Gateway DT |
|---|
| Role Type | ROLE_TYPE_CONTROLLER_CENTRAL_STATIC |
|---|
| Manufacturer ID | 0x035e |
|---|
| Product Type ID | 0x0001 |
|---|
| Product ID | 0x0002 |
|---|
| User Icon | 0x0100 |
|---|
| Installer Icon | 0x0100 |
|---|
| Frequency Plans | IL: 916.00MHz |
|---|
| Categories | Gateway Controller, Security Systems |
|---|
| Countries / Regions | Israel |
|---|
| Supported Command Classes | | Identifier | Name | Key | Version |
|---|
| COMMAND_CLASS_ASSOCIATION_V2 | Association V2 | 0x85 | 2 | | COMMAND_CLASS_ASSOCIATION_GRP_INFO_V3 | Association Group Information (AGI) V3 | 0x59 | 3 | | COMMAND_CLASS_DEVICE_RESET_LOCALLY | Device Reset Locally | 0x5A | 1 | | COMMAND_CLASS_FIRMWARE_UPDATE_MD_V5 | Firmware Update Meta Data V5 | 0x7A | 5 | | COMMAND_CLASS_INDICATOR_V3 | Indicator V3 | 0x87 | 3 | | COMMAND_CLASS_MANUFACTURER_SPECIFIC | Manufacturer Specific | 0x72 | 1 | | COMMAND_CLASS_MULTI_CHANNEL_ASSOCIATION_V3 | Multi Channel Association V3 | 0x8E | 3 | | COMMAND_CLASS_TIME | Time | 0x8A | 1 | | COMMAND_CLASS_VERSION_V2 | Version V2 | 0x86 | 2 | | COMMAND_CLASS_ZWAVEPLUS_INFO_V2 | Z-Wave Plus Info V2 | 0x5E | 2 | | COMMAND_CLASS_CRC_16_ENCAP | CRC-16 Encapsulation | 0x56 | 1 | | COMMAND_CLASS_MULTI_CMD | Multi Command | 0x8F | 1 | | COMMAND_CLASS_SECURITY | Security 0 | 0x98 | 1 | | COMMAND_CLASS_SECURITY_2 | Security 2 | 0x9F | 1 | | COMMAND_CLASS_SUPERVISION | Supervision | 0x6C | 1 | | COMMAND_CLASS_TRANSPORT_SERVICE_V2 | Transport Service V2 | 0x55 | 2 | | COMMAND_CLASS_INCLUSION_CONTROLLER | Inclusion Controller | 0x74 | 1 | | COMMAND_CLASS_POWERLEVEL | Powerlevel | 0x73 | 1 |
|
|---|
| Controlled Command Classes | | Identifier | Name | Key | Version |
|---|
| COMMAND_CLASS_BARRIER_OPERATOR | Barrier Operator | 0x66 | 1 | | COMMAND_CLASS_BASIC_V2 | Basic V2 | 0x20 | 2 | | COMMAND_CLASS_SWITCH_BINARY_V2 | Binary Switch V2 | 0x25 | 2 | | COMMAND_CLASS_CENTRAL_SCENE_V3 | Central Scene V3 | 0x5B | 3 | | COMMAND_CLASS_CONFIGURATION_V4 | Configuration V4 | 0x70 | 4 | | COMMAND_CLASS_DOOR_LOCK_V4 | Door Lock V4 | 0x62 | 4 | | COMMAND_CLASS_METER_V5 | Meter V5 | 0x32 | 5 | | COMMAND_CLASS_SENSOR_MULTILEVEL_V11 | Multilevel Sensor V11 | 0x31 | 11 | | COMMAND_CLASS_SWITCH_MULTILEVEL_V4 | Multilevel Switch V4 | 0x26 | 4 | | COMMAND_CLASS_NOTIFICATION_V8 | Notification V8 | 0x71 | 8 | | COMMAND_CLASS_THERMOSTAT_FAN_MODE | Thermostat Fan Mode | 0x44 | 1 | | COMMAND_CLASS_THERMOSTAT_MODE_V3 | Thermostat Mode V3 | 0x40 | 3 | | COMMAND_CLASS_THERMOSTAT_SETPOINT_V3 | Thermostat Setpoint V3 | 0x43 | 3 | | COMMAND_CLASS_ASSOCIATION_V2 | Association V2 | 0x85 | 2 | | COMMAND_CLASS_ASSOCIATION_GRP_INFO_V3 | Association Group Information (AGI) V3 | 0x59 | 3 | | COMMAND_CLASS_BATTERY | Battery | 0x80 | 1 | | COMMAND_CLASS_DEVICE_RESET_LOCALLY | Device Reset Locally | 0x5A | 1 | | COMMAND_CLASS_FIRMWARE_UPDATE_MD_V5 | Firmware Update Meta Data V5 | 0x7A | 5 | | COMMAND_CLASS_INDICATOR_V3 | Indicator V3 | 0x87 | 3 | | COMMAND_CLASS_MANUFACTURER_SPECIFIC | Manufacturer Specific | 0x72 | 1 | | COMMAND_CLASS_MULTI_CHANNEL_ASSOCIATION_V3 | Multi Channel Association V3 | 0x8E | 3 | | COMMAND_CLASS_VERSION_V2 | Version V2 | 0x86 | 2 | | COMMAND_CLASS_WAKE_UP_V2 | Wake Up V2 | 0x84 | 2 | | COMMAND_CLASS_ZWAVEPLUS_INFO_V2 | Z-Wave Plus Info V2 | 0x5E | 2 | | COMMAND_CLASS_CRC_16_ENCAP | CRC-16 Encapsulation | 0x56 | 1 | | COMMAND_CLASS_MULTI_CHANNEL_V4 | Multi Channel V4 | 0x60 | 4 | | COMMAND_CLASS_SECURITY | Security 0 | 0x98 | 1 | | COMMAND_CLASS_SECURITY_2 | Security 2 | 0x9F | 1 | | COMMAND_CLASS_INCLUSION_CONTROLLER | Inclusion Controller | 0x74 | 1 |
|
|---|
| S2 Classes | S2_ACCESS_CONTROL, S2_AUTHENTICATED, S2_UNAUTHENTICATED |
|---|
| Documents | |
|---|
| Features | | Feature | Values |
|---|
| Color | | | Communications Connections | | Value |
|---|
| RS-485 (Serial) | | Ethernet (Wireless/WiFi) | | Bluetooth |
|
|
|---|
| Association Groups | | Group Number | Maximum Nodes Supported | End Point ID | Group Name | Profile |
|---|
| 1 | 5 | 0 | Lifeline | 0x0001 |
|
|---|
| Texts | | ID | Description | Value |
|---|
| 23 | Controller Classic Inclusion | 1.Click the RisControl Smart Home Sub Tab, then click the Smart Devices Side Tab and then click . Add Devoce , Select the option+ include Device
2.When the ADD NEW SMART DEVICE Side Panel opens, the Gateway enters the Inclusion Mode and waits for an Inclusion signal from the device to be added.
3.Manually enter the Smart Device into Inclusion Mode, according to the device’s Installation Instructions.
Note: The Home Automation Gateway will wait for 2 minutes to receive an Inclusion signal from the new Z-Wave Smart Device before the timeout period elapses.
During data collection (which takes between several seconds to several minutes to complete) the following Side Panel opens.
4.In the Device Name field that shortly opens, enter a name for the device that best describes its function and/or location and then click save. | | 24 | Controller Classic Exclusion | To Delete a Z-Wave Device:
1.From the Sites List of the RISCO Cloud, click the SITE that you wish to enter
2.Click the SMART HOME Sub Tab, then click the SMART DEVICES Side Tab and click Remove device ; the REMOVE DEVICE pop-up window appears.
3.Activate the Exclude mode for the Smart Device that you want to exclude, according to the device’s Installation Instructions; after a short time, the device is removed. | | 10 | Controller Replication | N/A | | 11 | Controller SmartStart Inclusion | 1.From the Smart Devices screen, click Add device and then click on+Smart Start option
2.The SMART START Side Panel opens; you can either scan the QR code or manually enter the DSK of a device you want to add.
3.When the device is found, type the Label and click the “Add” button to register the device.
4.Add all the devices for Inclusion to the provision list.
5.To add a device, click Add Another
To start the Inclusion process, click on the “Start Inclusion” button and start powering up the devices that were added.
A message indicating that Inclusion has started will be displayed.
6.Click the “Close” button to return to Smart Home main page. While Inclusion is in progress, a message that indicates smart start is displayed on SMART DEVICES Sub tab.
7.The Inclusion will automatically stop after a configured time. To stop the Inclusion process manually, click "Click here to stop" and then click on ”Yes, stop Inclusion” button to confirm the operation.
Note: If the Inclusion is not in progress and there are registered devices for Inclusion, a message will be displayed on the SMART DEVICES Sub tab indicating the number of the devices waiting Inclusion.
8.To access the provision list or edit it, click on ."Click to view or to start inclusion."The SMART START Side Panel opens, displaying the registered devices
*To add a device, click Add another
*To remove a device, click Delete | | 25 | Controller Provisioning List | To access the provision list or edit it, click on ."Click to view or to start inclusion."The SMART START Side Panel opens, displaying the registered devices
*To add a device, click Add another
*To remove a device, click Delete | | 5 | Factory Reset Procedure | You can reset all the Z-Wave settings of the RisControl Smart Home Gateway.
Note: This action will remove all the connected devices from the system.
1.Click the GATEWAY Side Tab.
2.Click on the Gateway; the EDIT GATEWAY Side Panel opens.
3.If you are sure you want to proceed with the reset, click Reset, otherwise, click Cancel. |
|
|---|
| Supports NWI | Yes |
|---|
| Supports Explorer Frames | Yes |
|---|
| Supports SmartStart | Yes |
|---|